You can use the file lane to attach relevant documents to support each step of your journey map.
How to use a file lane
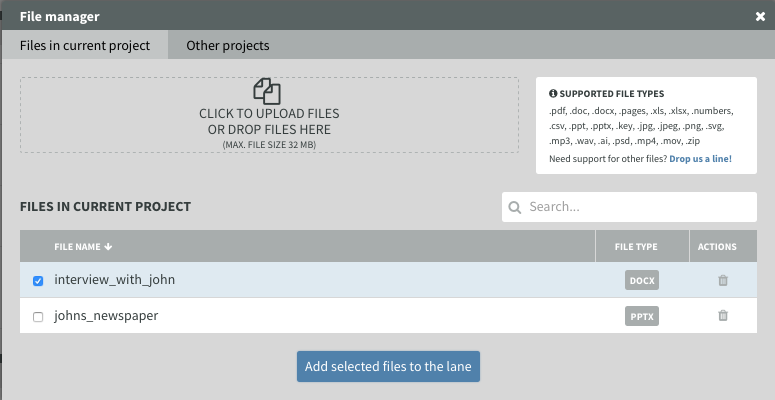
Create a new lane “File lane”. Then upload your files to the file manager and simply add them to the respective step. Also use the file manager to select files you’ve already added to other projects.
Only logged in users with access to your project will be able to download the files, so you don’t need to worry about privacy issues when exporting and sharing your map.
The file-size limit is 150MB.
File types supported
Supported file types include Microsoft Office and Apple iWork suite documents like text documents, spreadsheets and presentations, video and audio formats, Adobe Creative Suite files, image formats and archives. More concrete, supported file types are:
.pdf, .doc, .docx, .pages, .xls, .xlsx, .numbers, .csv, .ppt, .pptx, .key, .jpg, .jpeg, .png, .svg, .mp3, .wav, .ai, .psd, .mp4, .mov, .zip
If you need support for other file types, just drop us a line.
Who has access to the files uploaded on the file lane?
The files will be uploaded and hosted on the Smaply servers. Only logged in users with access to your project will be able to view and download the files. (Note: user of read-only or comment mode versions not able to view and download). Hence you should carefully decide who to give access to the journey map.
However that does not mean you need to delete the entire lane if you'd like to share the journey map with others! You can hide the file lane when sharing the journey map. A lane that is hidden will not appear on the read-only version or on the comment mode – as long as you show it again on the map.
As an example: This way you could upload your data to the file lane, but then hide a it before you share it with clients. When you stop sharing you can show the lane again.
Was this article helpful?
That’s Great!
Thank you for your feedback
Sorry! We couldn't be helpful
Thank you for your feedback
Feedback sent
We appreciate your effort and will try to fix the article